Archive for January, 2008

Winter Celebration Salad

Thursday, January 24th, 2008

jicamasalad.jpg


(Vegetarian, Vegan, Gluten-free)

On the Myers-Briggs personality test, I come out as an INF P/J. That is, introverted (but I prefer to call it internally-focused), intuitive, and feeling, with an almost even split on perceiving/judging. If you consider the first three typologies – self-navigated, intuitive/interpretive (and dare I say creative?), and emotionally flowing – well, just try to picture me cooking by the book.

It’s challenging enough for me to remember to measure and document how much of what I’m putting into each recipe I post. I could size up a serving and estimate – pretty accurately, too – the nutritional content of just about anything on a plate. But if you ask me to prove it – and show my work – well, we’ve got trouble.

As I do with every recipe for this site, for the Winter Celebration salad I painstakingly measured, weighed, sifted, leveled, fluffed and separated as appropriate, and wrote it all down in exacting increments. Imagine my distress when after all that, I lost it. The piece of paper that I’d been scribbling on went out with the recycling.

This blogging stuff is hard work!

As it turns out, I was happy to make and eat this dish again, and since it’s a salad it’s hard to get the proportions too wrong. The main challenge was the dressing. So I got to be intuitive here and you still get a recipe – it’s win win. And if the original recipe finally shows up, I’ll correct for any egregious mis-directions.

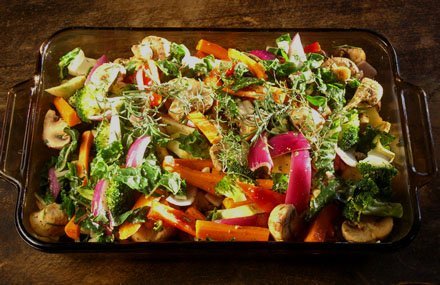
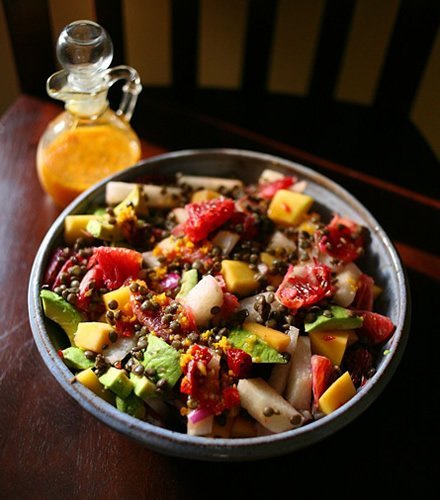
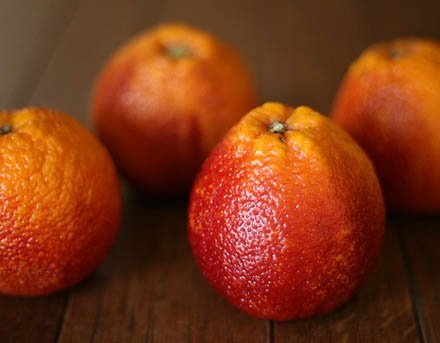
This salad is a true celebration of winter’s fruits. Mostly I made it because it was visually stunning, and I was thrilled when it tasted beautiful too. I’m crazy for blood oranges, which are too briefly in season. I can’t get enough of their vibrant purple-red flesh and their slightly berried flavor, so I knew I had to use them in a recipe while they were around. In this salad I’ve combined them with avocado, red onion, jicama (pronounced heek-uh-ma, also known as the Mexican potato), and mango (technically not a winter fruit, I know). This week’s heirloom bean is not a bean proper, but it is a legume — the French Green Lentil.

Blood Oranges

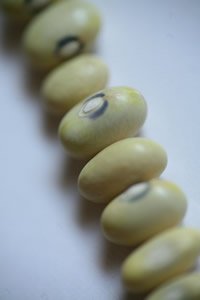
Like beans, lentils are their own branch of the legume family (Lens culinaris). They’ve been around since the Bronze Age, and almost all of them have the traditional earthy flavor and the appearance of a closed eye (hence the Lens in the Latin name, maybe? I’ll have to look that up). French Green lentils are an heirloom that I got from Victory Seeds. Technically they sell them for planting, but they sell a 3-ounce pack, and that’s plenty for a salad.

Described by Victory Seeds as a “very rare heirloom”, French Green lentils are a mottled olive color, with yellowish and almost black splotches. They have the traditional earthy lentil flavor, but the finish is almost peppery.

The Recipe:

Winter Celebration Salad

Ingredients
3 blood oranges, peeled and cut into pieces
1 jicama, peeled and diced
1 avocado, sliced
1 small red onion, diced
1 mango, cubed
2 cups cooked French Green Lentils (this is a lot of lentils for a salad but I didn’t want to waste any of them – you might want to use less)
¼ cup fresh cilantro, chopped, plus sprigs for garnish
¼ cup fresh parsley, chopped, plus garnish

Dressing:
Juice of one orange
Juice of 1 lime
4 tablespoons extra virgin olive oil
1 tablespoon white wine vinegar
1 teaspoon chipotle pepper, in adobo sauce (or you can use dried)
Salt and pepper to taste

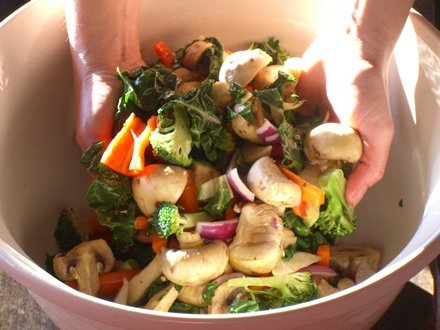
The beauty of this dish is that there’s not a bit of cooking. Just chop ingredients and combine. Mix the dressing ingredients in a bottle or jar and shake well, and add to salad (but since I winged it on this dressing, you better use your eyes as a judge to determine how much is enough. You don’t want to saturate the salad). Toss salad to lightly coat everything.

This salad is vibrant – the crisp-pearlike jicama, the fruity mango, the acidic but sweet oranges. The creaminess and the (monounsaturated) fat content of the avocado emulsifies and smoothes the flavors, and mellows the (very, very slight) heat that the chipotle lends the dressing. Enjoy!

Hutterite Bean Soup

Friday, January 18th, 2008

hutteritebeansoup.jpg

(Vegetarian, vegan/gluten-free option)

So this is embarrassing: when I was a kid, I used to play like I was a Hutterite. The embarrassing part (aside from you now envisioning me in make-believe games) is that I didn’t really know what a Hutterite was, and still don’t, entirely. It wasn’t their pacifist ideals or their community living, or even their great soup beans, that appealed to me. No, I was pretending to be a Hutterite because I liked the sound of the word.

All those harsh consonants and assertive vowels. A fast word, almost an imprecation. Something hurled at the car engine when your tinkering failed to make it ignite. The word opened all sorts of possibilities to my imagination.

I was a nerdy, wordy kid. Even my dress up games were word games.

I did look it up in an encyclopedia. There I was, 8 or 9 years old, and struck almost wordless (almost) by the fact that the Hutterites didn’t allow their members to wear aggressive uniforms – no cops, no military. The notion seemed mystical to me, more than anything. Being a Catholic school girl, I couldn’t imagine the absence of uniform. I liked it.

So it was with a strange sense of wonder that I responded to the discovery of the Hutterite Soup Bean, sitting pale and pretty on page 9 of the Seed Saver’s Exchange catalog. You can imagine my thrill when I discovered that they also sold them as eating beans.

I think that at the end of this year, these little beans will be very close to the top of my list. Unremarkable in appearance (unlike the Hutterite people, who often wear vibrant colors, unusual for a religious sect), the Hutterite Soup Bean is delicate and creamy, almost buttery. It’s no wonder then that when the Hutterites fled persecution in Eastern Europe and headed for North America, they packed the bean and brought it too.

hutterite-bean.jpg

The Soup Bean seems to have more natural oils than most beans, and so even though it’s dense it also melts in your mouth. In this recipe, I made a half-hearted attempt to mash some of the beans, and they were very agreeable (pacifists too, I guess). It strikes me that this would be a good chowder or hummus bean.

The Hutterite Soup Bean has made it onto the SlowFoods Ark of Taste. Seed Saver’s Exchange notes in their catalog that it’s on the “more endangered” section of the Ark, so if you’re looking for a dry bean to grow this season, this might be a good one. Also, I’ve read that it’s hardy, fast-growing and productive in the garden. And saving beans for genetic purity is relatively easy (but more on that as we get closer to gardening season).

The Recipe:

Like a lot of my soups and stews will, this one looks complicated. I promise, it’s not. It has fewer steps than the seafood chili because essentially you just dump it all in a pot, but it does have a daunting number of ingredients. It’s partly because I’m cooking without meat and have to build the complexity of flavor another way. It’s also because, as I explained in my first recipe, I layer my flavors, going for base notes, middle tones and a high finish. When you lift the lid during cooking, this soup gives off a rich, caramel aroma.

The ingredients are negotiable. Everything is in cooking. I really want to encourage you to trust your senses, to feel your way through food preparation, and to be open to the unexpected. That said, if you follow this recipe you’ll get a happy result.

So here we go:

Hutterite White Bean Soup

Ingredients:
Parmesan rind (not essential, but start saving those now because they are great for soup, and if you already save them then you know what I’m talking about).

1 tablespoon olive oil
1 large white or yellow onion, diced
5 cloves garlic, crushed
3 stalks celery, diced
1 small jalapeno, seeds removed
3 carrots, diced
2 potatoes, cut into small cubes (you can leave skin on – up to you)
6 cups vegetable stock
¼ cup chili sauce
½ cup fresh cilantro
½ cup fresh parsley
2 1/2 cups pre-cooked Hutterite Soup Beans

Seasoning:
2 bay leaves
1 teaspoon thyme
2 tablespoons cumin
1 teaspoon coriander
½ – 1 teaspoon dried jalapeno
2 teaspoons oregano
1 teaspoon paprika
Salt and pepper

Garnish:
Asiago shavings (or other hard sharp cheese)
Asiago croutons (recipe below)

In a skillet, heat olive oil on medium until it’s hot and then sauté the garlic and onion until it’s translucent, about 3 minutes. Add the jalapeno, carrots and celery, and cook another minute or two. Even though the veggies will soften as the soup cooks, I’ve learned from experience that sautéing them first helps them retain their texture.

Add the vegetable stock and the potatoes. If you have a rind from a hard cheese, add this to the water too. Add the dry seasonings (bay leaf, thyme, cumin, oregano, coriander, paprika and dried jalapeno), plus salt and pepper to taste. Add chili sauce and the beans, bring to a boil and then reduce heat and simmer for 30 minutes.

When the soup is getting near done, scoop up some of the beans with the back of a wooden spoon and gently mash them against the side of the pot. This will thicken the soup and vary the texture. Stir them back in, then taste the soup and adjust seasonings to your preference. Remove the bay leaves and the cheese rind and discard both. Add the fresh parsley and cilantro, and cook for another 5 minutes.

Before serving, garnish with Parmesan or asiago shavings and croutons.

Asiago Croutons
If you can’t buy them, they’re easy to make. Cut a loaf of asiago cheese bread into small pieces (or for a rustic look, tear them). Heat oven to 375, place bread cubes on baking tray, and let bake for 10-15 minutes, turning once and checking constantly. When they have begun to turn golden, remove them.

The Best Utensil

Monday, January 14th, 2008

The New Year’s Resolution Roast

veggiecasserole.jpg

(Vegetarian, vegan, gluten-free)

It’s possible that my sister-in-law won’t eat my cooking again. During the holiday season several of the women in my family gathered in my kitchen for a cookie-making marathon. And indeed it was; we whipped up chocolate mousse bites, Russian wedding cakes, cinnamon chip, ginger biscotti, peanut butter bars, and yes, cornflake wreaths (my sister’s specialty).

At one point during the clattering of pans, the roar of mixers and the raucous laughter, I realized that my sister-in-law was staring at me, aghast. I followed Heather’s gaze, which was settled upon my hands. Except that you couldn’t actually see my hands, submerged as they were in a dense, allspice-scented batter. I was working the hazelnuts into the dough. I gave Heather an inquisitive look, and she shrugged and turned back to her own wooden-spoon combined pastry. Later, I grabbed a handful of cake flour from the canister, unwittingly letting some fall through my fingers as I went to sprinkle it into my wet dough. Again, Heather caught me. This time I shrugged.

That’s how I operate in the kitchen. Intuitively, assertively, almost impulsively, smelling my way through things, using my eyes as a scale, my ears as an assessment of doneness. And unfailingly and unapologetically, using my hands as kitchen utensils. I’ve been noticing lately that this startles people. But why? My hands work better than any kitchen tool, and they’re always, well, on hand, and if I’m cooking then I’ve washed them first and I’m touching the food regardless so… what’s the big deal? And anyway, I’ve seen Jamie Oliver do it, so maybe I should just adopt some British-isms and then it will all be pukka.

Here’s a recipe that will give the fingers a workout. It isn’t a bean recipe. Heck, it’s barely a recipe at all. Now and then I’ll toss some non-legume foods into the mix, because the Year of the Bean Alone would be one long year. What this dish really is is my New Year’s resolution on a plate.

Simon and I are guilty of letting beautiful produce go to waste (and since I do 3/4ths of the cooking, that really means me). It’s not that we don’t eat it. It is, rather, that at markets and grocery stores I get kind of giddy when I see all those shiny peppers and happy tomatoes and multi-colored Swiss Chard stems. Though we entertain a lot, day to day it’s just Simon and me, and we end up composting an embarrassing amount of food (although, oddly, the cats love Brussels sprouts and edamame, so those never go to waste).

It’s no consolation to me to know that I’m not alone. Here’s a fact that left me bloody gobsmacked: According to a 2002 University of Arizona study, the average family throws away 470 pounds of food every year. That’s 14% of food brought into the home, worth roughly $650. There are actually a number of new food-storage technologies on the market to help slow food decay (if you’re interested in what I found, see the end of this post), but I’ve vowed that this year I’ll eat them while they’re fresh.

StirringVeggies

The Recipe:

Twelve days into the year and I was staring at a drawer full of veggies on the edge. Here’s a recipe for when you find yourself in the same straits.

1. Wash your hands. I mean scrub them. People are going to eat this stuff, after all.

2. Preheat your oven to 400.

3. Gather up all the veggies that are looking short for this world. Wash and then peel/core/chop them, and scrape them into a big bowl.

4. Gleefully using your very own fingers, toss the veggies.

5. In another bowl, combine enough olive oil to coat your veggies, some chopped garlic, a squeeze or two of spicy mustard if that appeals to you, salt, pepper, and a generous dash of vinegar. Also throw in whatever herbs smell good in the moment. For this batch, I used oregano, thyme, Fines herbs and a dash of tarragon. Mix well (use a spoon or a small whisk for this part — I did!) and then pour it over your veggies.

6. Get your hands ready. You’ll need them to toss the veggies again, making sure they’re coated with the oil/vinegar mixture.

7. Dump them into a baking dish.

8. If you are lucky enough to have fresh herbs growing inside, snip a sprig or two and throw it on top. I have rosemary and thyme, so that’s what I used.

9. Stick it in the oven and let it roast till veggies are tender but not mushy. The length of time will depend on what kind of veggies you used and how big you chopped them.

10. Using your hands (but wearing an oven mitt!), remove veggies from the oven while they’re sizzling, steaming and letting off a pungent aroma. Lovely jubbly!

Still, if you just can’t eat them fast enough, there are some new gadgets out there to help. I’ll probably mention this again at Easter, because it’s a perfect gift. It was around Easter last year that I discovered the E.G.G, or the Ethylene Gas Guardian. About the size and shape of an egg, and available in pastel shades like pink and yellow, these little guys get dropped into the crisper drawer and absorb up to 97 % of the ethylene, the gas that’s primarily responsible for produce decay. Other products that absorb ethylene are the ExtraLife disk and BioFresh produce bags. In my experience, the E.G.G.s work best though.

And of course if you do let fruits and veggies go bad, compost them!

Brown Tepary Beans

Friday, January 11th, 2008

Tepary Bean Whipped Hummus

TeparyHummus

(Vegetarian, vegan, gluten-free)

I think my second recipe should be simpler. I got a pointed request for a “chili with fewer steps, please,” so I’ll be getting to that before the cold season ends. But for today, I’m looking at a (really easy!) sort of hummus, made from one of my absolute favorite beans: tepary beans. It might be fair to say I’m in love with tepary beans. I was reluctant to use them so early in the year because I didn’t want to use them up, but happily there are multiple kinds of teparies. Native Seeds/SEARCH offers 28 different varieties of seeds; at the moment they’re only selling two teparies for eating (their offerings vary from season to season and year to year), but that’s okay because I keep things. And dry beans are made to be kept. From years past I still have a stash of teparies: white, blue speckled, and Paiute mixed. For my hummus, I’m using brown tepary beans.

First, a word on hummus. Technically it’s not, unless it’s made with garbanzos. I just wanted to preempt an uproar from the semantic diehards among you.

And some words on teparies. Though they’re little heard of outside the American Southwest, and not so much within that area anymore, they were a staple for the Native Americans living in that part of the world. They were first cultivated by the Hohokam Indians in Arizona – from 300-1200 a.d. These little beans have quite a bit of history under their pods, and it makes them even more remarkable for being around today, in our culture of processed food. Teparies are particularly suited to the American desert, because they love heat, drought, alkaline soils and relentless sun, and they mature relatively quickly – in about 85 days.

Teparies have been featured in the research that Native Seeds/SEARCH is doing on the effects of a traditional diet on Type II diabetes in Native American populations. I go into this a bit on the Where to Buy Beans page, but essentially NS/S has observed that the surge of Type II diabetes in that population directly corresponds to the rise of processed foods. The theory is that the Native American body evolved alongside the traditional Native American plants, and so their bodies have been shaped around these foods. Certainly, European Americans aren’t faring well on a diet of fast food either, but it is true that we may be more acclimated to heavier foods because we evolved in a colder climate. Very interesting stuff, and I’ll talk about it off and on as I move through this year.

One more fascinating thing about teparies. Recent studies conducted in the US and in Mexico indicate that lectin and other compounds in tepary beans may be a useful treatment for halting the growth of cancer. I don’t quite get this, because my understanding of lectin in plants is that it encourages them to grow, and concentrations of lectin thin out as the plant evolves from bean into mulit-leaved green thing. I’ll check with Simon, the science (and computer) wiz in our household, and see what he knows about that.

The recipe: Teparies are very dense beans. What’s more, they maintain their texture and density even when well-cooked, so at first it might seem counterintuitive to use them in a hummus recipe. I love their rich, nutty flavor though, and the fact that they are higher in protein and fiber, and lower in fat than other dry beans (which accounts for their density). To lighten things up, then, I added a cooked potato and whipped it up in the food processor along with the beans. It occurs to me that a sweet potato might work too, and would not dilute the brown color of the beans. It would also add beta-carotene. Next time I’ll try that and see how it goes. If one of you tries it first, please let me know.

As far as the garlic, I know what you’re thinking. “Holy (your word pick goes here), she’s putting 6 garlic cloves in with a few cups of beans? Between the breath and the intestinal distress, no one will want to be my friend…” Trust me here. I’m going to tell you something about garlic: the longer you cook it, the milder and softer the flavor (and the smell) becomes. Honest. If you sauté the garlic until it’s ghostly pale, the pungent bite will segue into a smooth, layered flavor that will give a lift to the teparies. Of course, there is some debate about whether cooked garlic packs the antioxidant and antibiotic punch that raw garlic does, but much of the consensus seems to be that if you crush the garlic and let it sit for a few minutes before cooking, it will retain most of its health benefits.

What else? For the olive oil, you want to use the best stuff you have. The oil isn’t cooked and so its sharp, citrus flavors will really shine through. I served this on crackers, but it’s lovely on crostini, or even as a sandwich spread. If you can’t come by teparies, go ahead and experiment with a bean other than the chickpea. And let me know what you find.

Tepary Bean Whipped Hummus Recipe

1.5 cups dry brown tepary beans
1 medium yellow potato
6 cloves garlic
Juice of 1 large lemon
3 tablespoons tahini (sesame butter)
1 tablespoon plus 1/3 cup extra virgin olive oil, plus oil for drizzling
½ cup fresh parsley
Water – added at ¼ cup at a time
Salt and pepper to taste — you’ll have taste and adjust to your liking

Soak the tepary beans in water. You can either soak them overnight or you can cover them in water, bring them to a boil, turn off the heat and let them sit for one hour. Then cook tepary beans until soft, about 1 ½ hours (teparies take awhile – that density again). Beans expand about 2.5 times when they are cooked, so use enough water – if you have too much you can always pour it off later, but you can’t unburn the beans! Cut the potato into large slices – you can leave the skin on — and add it to the water at the end of the cooking. Cook it until it’s soft, about 10 minutes.

Saute the minced garlic in 1 tablespoon of the olive oil until it’s see-through but not crispy. Place all ingredients except the water in a food processor. Puree until well mixed, and assess the dryness of your hummus. If necessary (and it likely will be) add ¼ cup of water and blend again. Continue to add water until you have a smooth, creamy consistency. Adjust salt and pepper, then serve. I like to garnish it with garlic stuffed green olives, but you can get creative here — parsley, capers, fresh carrots, tomato slices… Before serving, drizzle olive oil over hummus-topped crackers.

Note: the tepary beans came from Native Seeds/SEARCH. Next recipe we’ll be featuring Lina Sisco Bird Egg beans, from Seed Saver’s Exchange.