Dark Chocolate Cupcakes with Black Valentine Beans

April 17th, 2008


cupcake.jpg


Do you wish you could trick your kids into eating healthy when they think they’re getting away with chocolate mayhem? Trying to get your nephew to branch out into food groups beyond Ding Dongs and Twizzlers? Wanna pull one over on your spouse, who is more committed to the cookie jar than he is to the remote control?

Well don’t feed them these cupcakes.

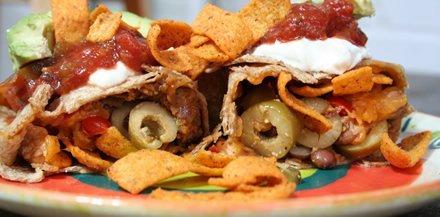
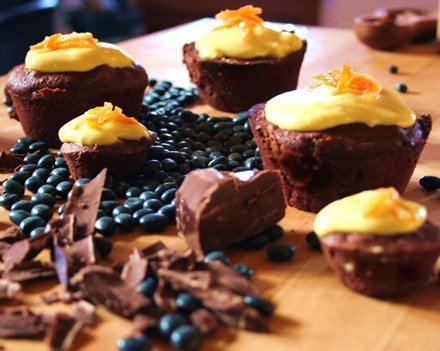
These velvety, rich mouthfuls are to cupcakes what Morningstar ‘nicken nuggets are to McD’s. Or what Silk is to milk. Wonderfully tasty and satisfying – and nearly guilt-free — but, well, they’re no Little Debbies. They’re dense and textured, like a deep Black Forest bread.

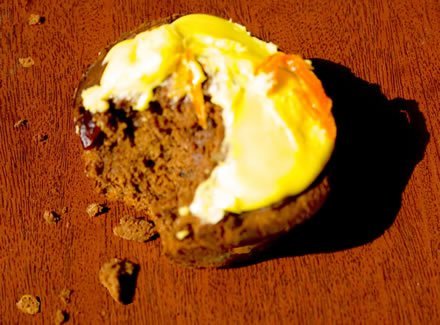
I fed these cupcakes to my 7 year old niece. True, she a) is not an adventurous eater and b) knew they were suspect to begin with, because of the way that everyone was snickering when they encouraged her to have a cupcake or two. She took a bite. With a solemn expression and in a low voice, she delivered her verdict. “Aunt Becky? These taste a little like dirt.”

Well then. Would you like a glass of soymilk with that?

On the other hand, I took a tray of these to work. My office mates scarfed them down with nary a gag nor any shout of “imposter!” Maybe these are grown up cupcakes.

Before I move on to the recipe, let me ask you: what strange concoctions have you whirled together in the kitchen and passed off on the unsuspecting? Or, what have you tried but failed to pull off? Mostly I’m interested in healthy versions of guilty pleasures, but I’m up for any unlikely  substitution.


Face it. Soymilk doesn’t pretend to be dairy-derived, and portabellas on the grill can’t pass as beef. That’s no crime against either.


bbcakes.jpg

The Recipe

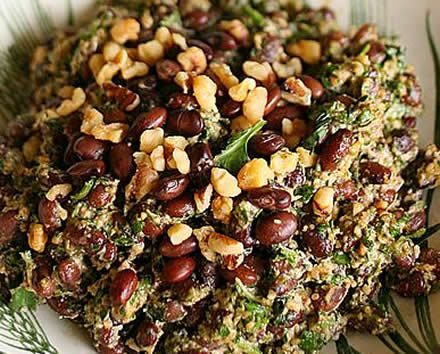
These cupcakes are a gallimaufry of unexpected ingredients, all of which add up to a complex and sometimes rebellious personality. There’s a heavy dose of dark chocolate here, which always makes me feel like I’m getting away with something. That, in combination with the beans, yields a silky, luxurious texture. Something happens though with the addition of oranges, lending the final product a spongy, moist quality. I used the brightest, tartest oranges I could find – they were almost too tart for straight eating. If the oranges available at your market are dull and drying right now (as I fear they might be, given the season), you might do half orange, half lemon.

Spontaneously, I tossed in some cranberries. I’d picked them up at Trader Joe’s – Omega 3 enhanced. Did they grass-feed them I wonder? I’m always on the search for ways to get my essential fatty acids, other than mercury-rich fish. The cupcakes seemed to like them.

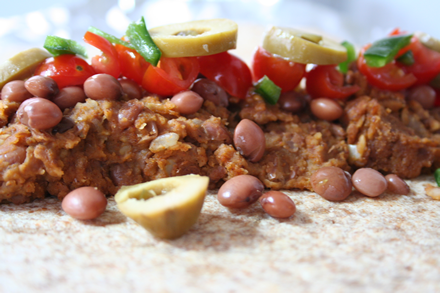
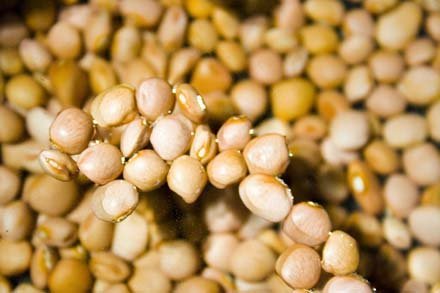
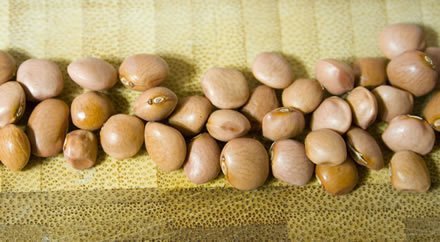
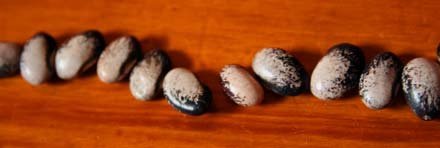
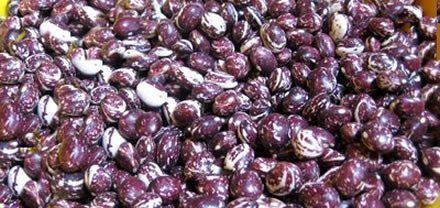
The main ingredient is the beans, a shiny heirloom called Black Valentine. I am pleased to announce yet another source of heirloom cooking beans — Purcell Mountain Farms. Not everything they offer is heirloom, but like these Black Valentines, they do carry quite a few, and their total bean offering is somewhere over 100 varieties (not to mention the peas and lentils).

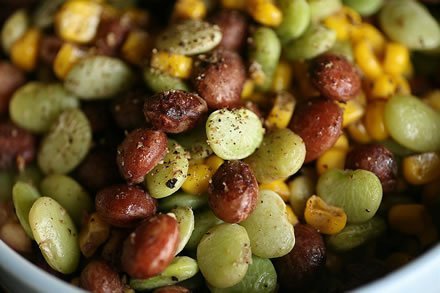
The Black Valentine is plump and creamy when cooked, more so than the typically drier black bean, which makes them as ideal for cupcakes as any bean can be. The variety has been around since before 1850, and was commercially released by Peter Henderson (whose name is on a lot of heirloom seeds) in 1897. The stringless Black Valentines can also be eaten green.

If you’re interested in growing them, they are available in seed packets from Baker Creek Heirloom Seeds and Victory Seeds.

I made a simple sour cream frosting to top these guys – the slight acidity of the cream complements that of the citrus, while the fat smooths out the flavors. I also made candied citrus peel as a final decoration. The longer the citrus peel sits, the sweeter it becomes.

If you want to modify these cupcakes so they’re more like a sweet confection than a velvety dessert, I’d suggest doubling the sugar and opting for a sweeter, non acidic cream cheese frosting. To make them closer to kid-friendly, you might leave out the citrus and berries all together. The heavy dark chocolate makes them rich and dense, so to lighten it up you can reduce the melted chocolate by about 1/3 and instead stir in chocolate chips and a dash of cinnamon.

Black Bean Cupcakes

12 ounces high-quality dark chocolate
5 tablespoons butter
1 teaspoon milk
1 ½ small oranges
Zest from 2 oranges
1 ¾ cups cooked Black Valentine beans
1/3 cup water
4 eggs
1 cup granulated sugar
1 teaspoon pure vanilla extract
1 teaspoon lemon or orange extract
1 ¼ teaspoons baking powder
¾ teaspoon salt
1 ¾ cups flour
1/3 cup chopped walnuts
1/3 cup dried cranberries

cucpake2.jpg


Preheat oven to 350 degrees. Spray muffin tins (12 large, 24 mini, or any combination thereof) with cooking oil.

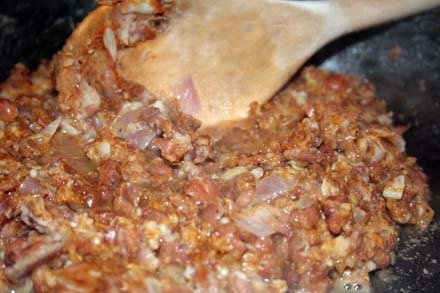
Place chocolate, milk and butter in a microwavable container. Microwave in 30 second increments, stopping to stir ingredients, until melted and smooth. Set aside.

With a grater, remove zest from the oranges, being careful not to collect any of the bitter pith. Then remove the pith from the oranges and cut 1 ½ of the oranges into pieces. Place zest and orange in food processor. Add the water and process until smooth. Add the eggs, sugar, vanilla and citrus extract and process again until smooth. Pour mixture into large bowl, and fold in the melted chocolate.

In a small bowl, combine the flour, baking powder and salt. Stir this into the wet ingredients, mix well, and then add the walnuts and cranberries, stirring just until blended.

Spoon the mixture into muffin cups. Bake until a toothpick inserted into the center of the cakes comes out clean. Large cupcakes will take about 30 minutes, and mini cakes will finish in about 15.

When cupcakes cool, frost with sour cream icing and garnish with candied orange peel.

Sour Cream Frosting

3 tablespoons butter, softened
3/4 cup sour cream
1/2 teaspoon vanilla extract
1/2 teaspoon lemon extract
3 cups confectioners’ sugar

In a medium bowl, mix together the butter, sour cream, vanilla, lemon juice and salt. Stir in confectioners’ sugar, and beat with an electric mixer until smooth. For the bright yellow color, I added food coloring — your choice.

Candied Orange Peel
Peel from 2 oranges
2/3 cup water
1/2 cup sugar
1 tablespoon apple cider vinegar

Using vegetable peeler, remove rind from oranges in strips, being careful to avoid the white pith. Cut rind into matchstick strips. Place in small saucepan and cover with water. Bring to boil, then immediately drain and rinse with cold water. Drain again.

Combine 2/3 cup water, sugar, and vinegar in medium saucepan. Bring to simmer, stirring to dissolve sugar. Add orange strips; and simmer for about 10 minutes, until orange peel is translucent. Drain and cool.


Frito Burritos with Santa Maria Pinquito Beans

April 12th, 2008

burrito2.jpg

Who remembers the Frito Burrito? Yes, from Taco Bell. Hey, I had my fast food days. Though, back in that day, ordering a drive-thru burrito without the meat got you the same thing that asking the kid behind the counter to explain a Mandelbrot set would: utter bewilderment. Followed by a quick glance around the room, as if expecting to be told he was on Just For Laughs.

Nope, no punch line. Not for meat-pushing Taco Bell kid serving up the Frito Burritos, and not for you either, waiting to see if I’m joking about this excursion into the culinary slums. I’m not. I love Fritos. I love burritos.

(Truth is, sometimes I think I’m less a girl than most others with my chromosomal composition because, given the choice between chocolate and Fritos, I’d almost always opt for the salty chips. Though a thought now occurs to me: might they pair well with kakao…?)

burrito1.png

Honestly, there’s something deeply satisfying about the crunch that Fritos give to a burrito. Aside from the fact that you can’t get them at Taco Bell anymore, there are some perks to making them at home. You have a kaleidoscope of choices for tortillas, including a healthier whole wheat option, or corn for those celiacs among us. Ditto with cheese – Monterey, Mexican queso, it hardly matters actually. The big benefit here is that it’s real cheese! Then there’s the blow-you-a-new-nostril salsa, which, no matter how hot they say it is, it never really is in restaurants (correct me if you know otherwise).

Or, say, you can use heirloom beans.

The recipe

Burritos are so easy that this would hardly count as a recipe if I weren’t going to hand over my technique for refrying beans. I even use a packaged burrito seasoning mix – it wouldn’t taste like fast food if I went to all the trouble of making my own.

Refried is really a misnomer for this style of beans. In Spanish they are frijoles refritos, which literally means well-fried beans. Probably it was simply mistranslated into English. Traditionally it’s made with pinto beans and fried in lard. Of course I broke with tradition on both counts.

santamaria.jpg

The heirloom I went with is the Santa Maria Pinquito bean. Though there’s not much info about this bean’s history, a quick internet search turned up tons of recipes involving barbecue (Santa Maria is actually a style of barbecue), smoked foods, jerky and salsa. A perfect burrito bean. The color and size of pebbles, the Santa Maria Pinquito is quick cooking and meaty. It also has a bit of a dusty, earthy flavor.

santamariabeans1.jpg

Before mashing the beans, I scooped some out and set them aside for rolling into the burritos. It seemed sacrilegious to render all of these heirlooms unidentifiable.

As for the Fritos, it will only do to use the real deal. I’m a brand loyalist when it comes to my junk food.

Refried Beans
3 ½ cups cooked Santa Maria Pinquito beans, plus one cup of their cooking water
1/2 cup olive oil
1 cup white onion, finely diced
5 cloves fresh garlic, minced
½ jalapeno, seeded and minced
1 teaspoon sea salt

In a heavy skillet, on medium heat sauté the onion and garlic in the olive oil until translucent, about 5 minutes.

refried-beans.jpg

Add the beans to the skillet and stir well to mix in garlic and onion. Heat slightly and then mash the beans with a potato masher or the back of a wooden spoon. Add the cooking liquid, working it in 1/3 cup at a time, until the mash is moist and smooth. Continue to heat, stirring frequently, until the beans are a thick paste. At this point you can refrigerate them for up to five days, or you can turn them into burritos.

Frito Burrito
Santa Maria Pinquito refried beans, plus the unmashed beans
1 package Taco Bell taco seasoning
1 large tomato, diced
1/3 cup diced jalapeno-stuffed green olives
1 package of extra-sharp cheddar cheese
6 whole wheat flour tortillas
A generous handful of chili-cheese Fritos
1 ripe avocado, sliced
Salsa (you pick the heat level) for garnish
Sour cream for garnish

Preheat oven to 375 degrees.

On stovetop on medium heat, stir packaged burrito or taco seasoning into the refried beans. Mix well.

In each tortilla, spread a generous layer of the refried beans. Sprinkle on some of the whole Santa Maria Pinquito beans. Add the diced tomato and olives, dividing them between the burritos. Add a generous amount of sharp cheddar to each, and then wrap them up, folding in sides and then rolling them over themselves. With seam down, place each tortilla in a sheet of aluminum foil and wrap tightly. Place in oven to heat through until cheese is melted, about 10 minutes.

Remove burritos from oven, and place each one on a plate. Unwrap them carefully and add a handful of chili cheese Fritos to each one. Roll them back up again, and garnish with avocado slices, sour cream and salsa. For good measure, scatter extra Fritos on top. Comida!

Black Nightfall Beans with Walnut Sauce

April 5th, 2008

walnut2.jpg

(Vegetarian, Vegan, Gluten-free)

Surely, there were days before the rain. Certainly, there will be days that follow that bring no rain. I know that it’s spring with a capital S and that the gummy mud spreading across my flower beds is holding, under the gurgling surface, seeds and roots that are soaking up this generous waterfall in preparation for breaking into life. Even so, I’ll be glad for some sun with a capital S.

It’s in these transitory days, the time between the worlds, that I crave a dish that’s bursting with life. Black Nightfall Beans with Walnut Sauce certainly fits the bill. The walnut oil gives a thicker, creamier consistency than olive oil would while also offering a delicate flavor, and the oil contains high levels of Omega 3s. Note though, this is not a good cooking oil because heat makes it go bitter. Paired with fresh basil and parsley and scallions, this dish is lively and clean. The walnut oil and the fresh basil add a bit of extra cost, but in the middle of incessant cold rain, it’s so worth it. I call this dish the restoration of faith in the return of spring. Like last week’s succotash, this dish has relatively few ingredients and is easy to make.

The bean du jour is Black Nightfall, which I found at Rancho Gordo. Wacky, irreverent, and full of culinary surprises, this place is definitely worth checking out.

blacknightfall.jpg

Black Nightfall beans are plump and white and air brushed with black – I suppose the way the sky looks when night is seeping into the remaining daylight. When cooked, they turn a soft reddish-black shade and hold their shape, but as soon as you bite into them they fairly melt in your mouth. They have a bit of sweetness, which would make them work well in spicy or smoky dishes.

A note: I thought this recipe would be good for eating straight, like a bean salad, but the walnut oil and creamy beans give this a pretty hefty mouthfeel. Tim, who photographed this for me, and I ended up spreading it onto toasted bread and eating it like a bean dip. The bread absorbs some of the oil.

walnut.jpg

Before we get onto the recipe, a bit of seed-geek news. I had the honor of meeting and talking with Diane Ott Whealy last weekend, at a reception at Bowood Farms. Diane is the co-founder of Seed Saver’s Exchange, and she came to talk about the SSE seed collection and the preservation work they are doing. She presented a slideshow which was stunning beyond words

If her intent was to inspire us all, it worked. I’ve got little seedlings poking up through the soil in my makeshift greenhouse (really, a sun porch desperately in need of insulation and new windows). I’ve also got seeds on the way, from SSE and Baker Creek Heirloom Seeds. Beans? You betcha. I’m going to be farming a bit of land this summer, so plenty of room to grow out the beans that will get me through the end of the year, but more on that later.

The Recipe

Black Nightfall Beans with Walnut Sauce
1 ¾ cups cooked Black Nightfall beans, with about 1/3 cup of their water reserved
¾ cup walnuts
A bit of olive oil, for sautéing
3 garlic cloves, minced
4 teaspoons champagne vinegar (you could use white wine vinegar)
2 tablespoons walnut oil
3 scallions
4 tablespoons fresh cilantro
4 tablespoons fresh parsley
3 tablespoons fresh basil
A pinch or two of cayenne (optional)
Salt and pepper to taste

In small skillet, sauté two of the garlic cloves in a bit of olive oil until translucent. In a food processor, combine raw and cooked garlic and the walnuts. Pulse a few times to crumble. Add oil, vinegar, and about 3 tablespoons of the reserved water. Whirl in food processor, adding more water if necessary, until you have a smooth paste. Add half the fresh herbs, plus the scallions, salt, pepper and cayenne if using. Whirl once more, briefly, to work ingredients in. Spoon the sauce over the beans and garnish with the remaining fresh herbs.

You can make this in advance and store in the refrigerator, but let it come to room temperature before serving.

Succotash with Good Mother Stallard Beans (and Without Bear)

March 28th, 2008

succotash.jpg

 (Vegetarian, Vegan, Gluten-free)

There are as many recipes for succotash out there as there are imitations of Sylvester the Cat lisping over the syllables. Like cornbread, every region within the US seems to have its own version of succotash.

That’s what I like about it. This is the kind of dish that speaks to me on the same level that heirloom seeds do. Succotash is a dense historical novel on a plate, with a plot that delivers tragedy, triumph, courage and transition, and turns on survival and celebration. This dish is itself an heirloom, a native to this continent that evolved over time, with the people, depending on what they had and what they could cultivate. It was as dependent upon them as they were on it.

It’s a place-based food, succotash is. Like a true story, every person who tells (cooks) it will tell (cook) a slightly different version.

When we think about our own historical roots, U.S. residents tend to look to Europe and Africa and Asia, to places with much broader stories than our history in this place. The part of American history that belongs to us is very young.

But America does have a rich history, much older than the 232 years that we generally think of. Some of this country’s most powerful stories can be told through the food that has been handed down.

True succotash contains lima beans and corn. The rest seems to be up for grabs.

nutmeg.jpg

Like most stories, this one seems to embrace paradox. For instance, succotash is thought to be one of the first recipes the Algonquin Indians taught the settlers at Plymouth Rock. If this is so, then the early versions couldn’t have contained the requisite lima beans, since those are a long-season, warm weather crop. Succotash was also made by the Narragansett Indians, who called it misckquitash, which means “boiled corn”. It is notable that the two primary ingredients are two of the Three Sisters – beans, corn, squash — the main agricultural crops of many Native American tribes.

I found versions containing green beans, bell peppers, squash, onions and peas. I’ve even seen it with tomatoes and broccoli. Since those aren’t native crops, I tend to think these aren’t true succotash recipes.

The recipe

You’ll be relieved to know that I omitted bear fat. Yes, it’s a true native American food when it’s held together with the lard of Ursus Americanas.

I tried to keep my version as true and simple as possible, with a couple of deviations. There’s my addition of nutmeg (not, in case you were wondering a native spice!). In place of bear (or, as is commonly used now, butter or cream) I used olive oil. This rendition is simple and straightforward, which is what the bean calls for.

Good Mother Stallard is the star of this recipe. I purchased these beans from Seed Saver’s Exchange, but they’re also available from Rancho Gordo, who I’ll be talking about in next week’s post. Like the Hutterite soup bean, Good Mother Stallards are going to the top of my list.

stallard2.jpg

When cooked, they plump up till they are almost perfectly round. Dense, meaty, gorgeous and delicious, this bean deserves a simple dressing so that its personality can shine through.

Though I didn’t try it myself, I’ve been hearing that they yield an almost perfect pot liquor (the liquid left over after boiling something). Even after cooked, it holds onto its creamy color and burgundy markings (though the burgundy bleeds into the cream a bit). It’s nutty, earthy and extremely rich.

The seed was acquired by Seed Saver’s Exchange over a decade ago, from Glenn Drowns, a prominent horticulturalist and plant breeder. It’s a family heirloom that goes back many generations.

Succotash
¼ cup olive oil (traditionally bear fat, but I was out of that)
1 1/2 cups cooked Good Mother Stallard beans
1 cup cooked fresh or frozen shelled lima beans
3 cups corn
Black pepper, freshly ground
Salt
Nutmeg, ground fresh

Place Good Mother Stallard beans, lima beans and corn in a large, heavy skillet. Add olive oil and toss well to cover. Heat mixture on medium high heat for about 8 minutes, until hot all the way through. Add salt, pepper and nutmeg, adjusting to your tastes (I prefer a heaveier dose of nutmeg and pepper and less salt). Serve immediately.