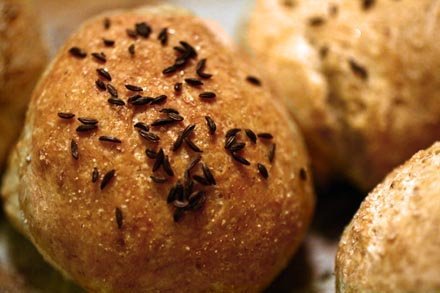
Warning: This post could lead to a serious obsession with daily bread baking.
I discovered the Artisan Bread in Five Minutes a Day technique rather by accident. I’d been cooking from Shirley Corriher’s Bakewise, a brilliant tome that I had been awaiting like the Promised Land. All the way back in 1997 when Corriher’s first book, Cookwise, came out, she’d been alluding to the ever-forthcoming Bakewise. When it finally came out at the end of last year, I was there in line like it was the next chapter in the Harry Potter saga. Both books are dense, sometimes plodding but accessible and intelligent hands-on guides to why things do what they do in the kitchen – and how to make them do other things instead — and both have become indispensible in my kitchen.
In Bakewise, Corriher argues that there is no need to knead yeast dough because it kneads itself as it rises, and hand kneading leads to over-oxidation, which compromises flavor. And who needs that? Still, I was resistant. After all, I’ve been making bread for 15 years and I’ve gotten quite accomplished at it, and every baker knows that the secret is in the kneading.
Blast it. Corriher was right.

But back to Artisan Bread in Five Minutes a Day.
The first time I made golden, crusty, batter-free no-knead bread, I assumed it was a fluke. But it was so darn easy that I tried it again, and then again. Soon I had far more dough than I needed (since I hadn’t kneaded) and so I baked a chunk of it and tossed the rest in the fridge. Though it was a bit tricky, figuring out how long out of the fridge the dough had to rise, how warm it should get, how long cold dough would keep, etc, overall I was pleased with the results I was getting. But I wasn’t telling anyone. I kept right on impressing my friends and family with my homemade bread, and I continued to let them think it was all very hard work.
Then in November, Jeff Hertzberg and Zoe Francois gave us Artisan Bread in Five Minutes Day: The Discovery that Revolutionizes Home Baking (Thomas Dunne Books, 2007). This beautiful little book takes all the guesswork out of it, and it blew my palate wide open. They also blew my cover.
I had one recipe I’d been sticking with, a basic, four-ingredient bread. I knew how to make it work without kneading and after cold storage. Artisan Bread in Five Minutes a Day has recipes for everything bread-like, no exaggeration. But first they teach you how and why.
The book’s opening chapters tell you all you need to know about no-knead bread (okay, I’ll stop now): what the different flours do, why it’s okay to skip the kneading and why the bread’s flavor is actually enhanced if the dough rests for several days. Hertzberg and Francois illustrate how to handle and shape bread, and how to take it to the right temperature, and most importantly, how to bake it to achieve the coveted crusty European texture. And then we get into the recipes.
The first recipe is the only one you’ll ever really need, a simple, rustic flour-salt-water-yeast bread. Hertzberg and Francois’s recipe for boule turns out a perfect loaf – chewy, moist, crusty, with a lovely, slightly tangy flavor. They offer slight modifications for turning this basic recipe into baguettes, ciabatta and a tartine, and I tried them all. No matter everything I know about the merits and virtues of eating whole grains – this is, and always will be, my favorite kind of bread. Give me a grassy olive oil, some freshly shaved Parmesan, a dash of salt and I’m in simple-carb heaven.
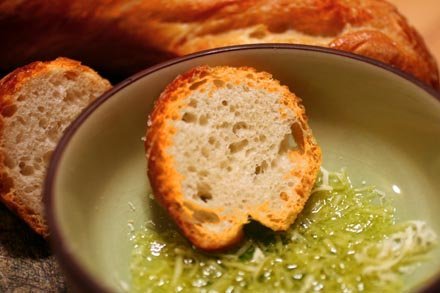
But woman cannot subsist on white bread alone, and Francois and Hertzberg make sure we won’t have to. The rest of the book is filled with all those intimidating-sounding recipes: whole wheat sandwich bread, olive bread, limpa, pumpernickel, walnut-date loaves, flatbread and pizza, Moroccan anise and barley bread, and a dizzying selection of dessert breads, including sticky buns, jam-filled beignets, and chocolate bread.
And no, you don’t have to knead any of it.
And yes, you can have freshly baked buns for your black bean burgers in five minutes a day (plus baking time). You just have to make the dough and store it till you want it. Here’s the recipe, based on Hertzberg and Francois’s European Wheat Bread:
Crusty Wheat Buns (for the harissa burgers that are coming soon)
3 cups lukewarm water
1 ½ tablespoons granulated yeast (I use instant)
1 ½ teaspoons salt
½ cup rye flour
1/2 cup whole wheat flour
5 1/2 cups unbleached bread flour
Cornmeal or semolina for the baking stone
Mix yeast, salt and water in a 5-qart bowl or lidded (not airtight) container. Stir together the flours, then add to the yeast mixture. Stir to combine but don’t knead it. You can use a wooden spoon or a mixer with a dough hook; if using the latter, run mixer just until ingredients come together.
Cover and allow to rise at room temperature for about 2 hours, until the dough rises and then collapses on itself. Now the dough can be shaped and baked, or stored for up to 14 days. Whatever you are storing should be kept in a lidded container or a Ziploc bag that is not sealed completely — the bread will need a bit of air.
Select the amount of bread you wish to bake. Shape pieces into buns, keeping in mind that they will double in size as they rise and bake. Allow to rise for 30 minutes.
When there are 15 minutes left in the rising time, preheat oven to 450 degrees. Place a baking stone on the top rack. Just before baking, bring a kettle of water to a boil and place a tray on the bottom rack of the oven. Pour the water into the tray, being careful of the steam that will hiss towards your face. In other words, don’t lean over the oven!
Sprinkle the baking stone with semolina. You may brush the rolls with olive oil and dust with salt, caraway seeds, or other seeds of your choice. Slide rolls onto the baking stone and bake, turning once, for about 20-25 minutes, until golden brown on the outside and soft on the inside.
And now – what to serve inside the buns?
Harissa
In a few days – I swear, dear, loyal readers. A few. Days – I’ll bring you the black bean burger recipe. I can’t blow all my material in one post. And you’ll be grateful that I showed you how to make harissa when it’s time to make the burgers.
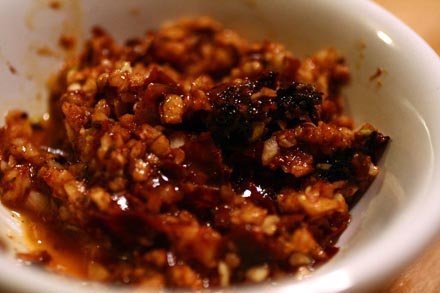
Suddenly I can’t get enough harissa. Maybe it’s because – up until this week – it’s been bracingly cold outside. Maybe it’s because I’ve had a permanent sinus headache. Or perhaps it’s just that lately I’ve been striking out in the kitchen. Tell me you all go through phases like this, where everything you cook is disappointingly bland at best? And more often than not it falls apart, has a funky, dissonant flavor, and just plain fails? That’s been the story at Cucina Rebecca. My kitchen episodes this month have all ended up on Bloopers.
Thank goodness for harissa. The aromatic, fiery and yet surprisingly complex spice mix has become my go-to sauce, my condiment du jour, my ingredient to liven and loosen things up and, when I’m living recklessly (or just really need to blow my nose), my crostini spread of choice. Harissa packs a punch and it’s not sorry for it later. And it’s so startling that, I, at least, have forgotten to be disappointed in my food.
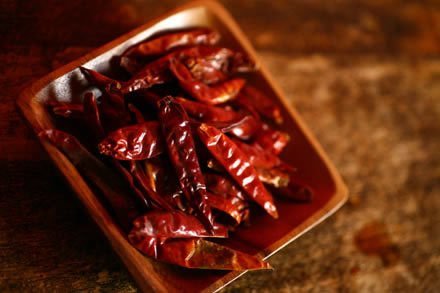
Now, if you’re just here to eat, skip this paragraph. I’m about to explain to you why harissa is so valuable during the apex of winter cold season. In short, harissa is brimming with capsaicin and allicin, a potent infection-fighting duo. Capsaicin, found in chiles, inhibits substance P, a neuropeptide associated with inflammatory processes (which is also being studied for its role in heart disease). The hotter the chili pepper, the more capsaicin it contains – and the bigger its health punch. Chiles also are super-high in pro-vitamin A, affectionately referred to by nutritionists as the “infection-fighting vitamin”. Then there’s allicin. Found in raw or lightly cooked garlic, allicin is a powerful antibacterial and antiviral agent; when it joins forces with the vitamin C, also abundant in garlic, they become a force for harmful microbes to reckon with. Recent research has shown allicin to be effective not only against common colds, flus, and stomach bugs, but also against the scary pathogenic microbes including tuberculosis, botulism, and even MRSA (the bad staph). Need I say more?
The Recipe
Though you can purchase harissa, making it yourself lets you control the heat and the quality of the spices. It will keep in the refrigerator for several weeks.
 |
 |
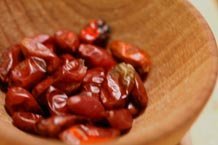
Not unlike rouille, my other favorite condiment, harissa is built upon a pungent base of fresh garlic and chile peppers. To achieve a layered profile, I use a variety of dried chiles of varying heat. The flavor is then shaped and balanced by cumin, coriander and caraway; though it disturbs the nice alliteration I’ve also seen some harissa made with rose petals.
4 ounces dried chiles (I use a mix of anchos, pasillas, a bit of dundicat and a chipotle for smokiness)
6 cloves garlic, peeled
1 1/2 teaspoons kosher salt
1 teaspoon caraway seeds, freshly ground
1 1/2 teaspoons coriander seeds, freshly ground
½ – 1 teaspoon cumin
2 tablespoons good olive oil
Place dried chiles in a bowl. Bring a cup of water to a boil and pour it over the chiles to rehydrate them. Allow to steep for 30 minutes. Remove the chiles from the water remove the stems and seeds (you can toss in a few seeds if you really want the heat). Place in a mini food processor or a mortar and pestle. Add the fresh garlic, salt, caraway, coriander and cumin and pulse or pound to grind the spices and combine them. Gradually add the olive oil and continue mixing until blended. Don’t use too much oil – you want the harissa to hold its shape on a spoon. Feel free to adjust the seasonings to your preference – I’m not a fan of caraway so I go light, but other recipes use more.

